So far the examples were very basic, now we are getting to the first real topic - the movement. This example bot shows how to deal with goal of getting from place A to place B. First we will describe space representation used by UT2004 and PogamutUT2004, then we will show Pogamut objects facilitating the path planning and execution of precomputed path.
Navigation graph is basic space representation used for
navigation. The map is covered by nodes called navigation
points, in short navpoints. Each navpoint
is located in some safe location that can be reached by the bot. When
there exists direct path from one navpoint to another then they are
connected with an edge. With this representation finding a path from
navpoint A to navpoint B can be easily solved with any graph search
algorithm, particularly popular is heuristic A* algorithm (pronounced "A
star"). Output of the path planning algorithm is sequence of nodes that
should be followed in order to get to the target location.
Navigation in the level is divided into two stages:
-
Plan path between two navpoints
-
Follow this path
Path planner is object responsible for the first stage of this
process. Pogamut comes with one default implementation of
PathPlanner interface called
UTAstar. UTAstar is a
proxy object that provides functionality of Unreal Tournament internal
A*, this means that your bot can use exactly the same path planning
algorithm as native UT bots. The planner is instantiated by:
UTAstar utPathPlanner = new UTAstar(getAct(), getWorldView());
UTAstar's constructor requires
IAct and IWorldView
interfaces because it sends some commands to the game engine using the
IAct and receives response through
IWorldView events. If you want your bot to use
different path planning strategy just code your own
PathPlanner implementation.
Path executor is responsible for moving the bot along precomputed
path, avoid obstacles, open doors, wait for lifts etc. The default
implementation of PathExecutor interface is
UTPathExecutor. Again as in the case of
PathPlanner you can provide your own
implementation of this interface, for example you can implement new path
executor that will enable the bot to avoid incoming rockets while moving
to the target.
 pathExecutor = new UTPathExecutor(
                    getWorldView(),
                    getAct(),
                    utPathPlanner);   // notice that the path executor has pointer to the path planner
UTPathExecutor's constructor requires
IAct and IWorldView object
as the PathPlanner did, and additionally it must
be provided with pointer to the PathPlanner
instance that will be used by the executor. This pluggable design
enables providing custom executors or planners. The API that is most
important for bot programmer are goTo(...) and
addPathListener(PathExecutorListener) methods
of PathExecutor. The goTo(...) method makes the
bot to go to the specified location,
goToRandomNavPoint() shows example usage of
this method:
    /**
     * Picks random navpoint and goes to it.
     */
    protected void goToRandomNavPoint() {
        NavPoint navPoint = pickNewRandomNavTarget();   // obtain navpoint
        pathExecutor.goTo(navPoint);                    // go to it
    }
Once the goTo(...) method is called the
bot starts moving towards desired navpoint. To get notified about path
execution status we have to register listener on path executor:
            // specify what will happen when the bot reaches its destination
            pathExecutor.addPathListener(new PathExecutorListener() {

                public void onEvent(PathEventType eventType) {
                    if (eventType.equals(PathEventType.TARGET_REACHED)) {
                        // if target was reached
                        goToRandomNavPoint();
                    }
                }
            });
Each time target location was reached this
PathExecutorListener implementation will make the
bot to again choose new random navpoint and go to it. The resulting
behavior is the bot wandering around the level until stopped.
For debugging it is often useful to see the navigation graph the bot is following. You can visualize the graph in Unreal Tournament itself or in the Netbeans plugin. We will describe both possibilities.
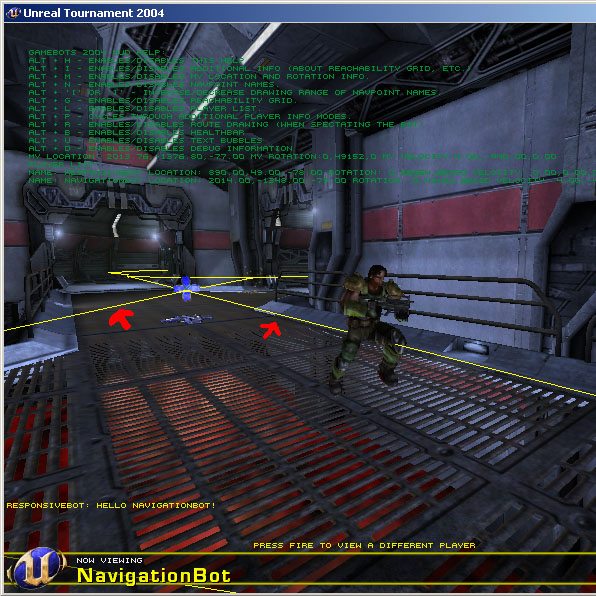
If you are in UT you can easily show the graph by pressing Alt + G. This will add the navigation graph to the rendered image. After pressing this combination you will see graph with set of edges also rendered in the image. Notice that the edges have arrows indicating their orientation. Some edges are only one way, e.g. you can jump down through the window but you cannot get to the second floor by jumping from ground to the window.
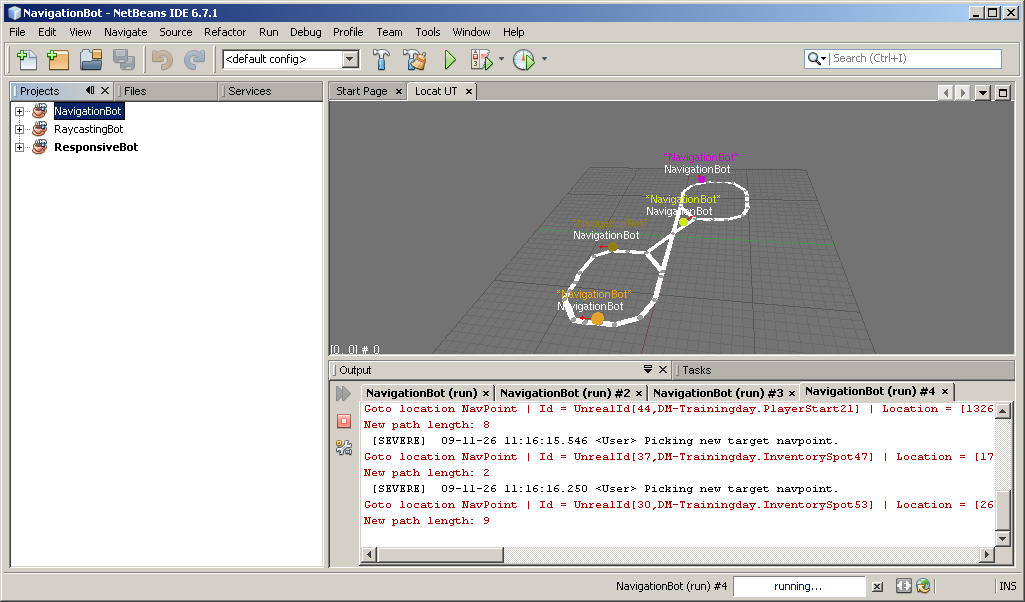
Second option how to visualize the navigation graph is to show the whole level in map viewer build in the Netbeans plugin. To show this map double click UT server node.
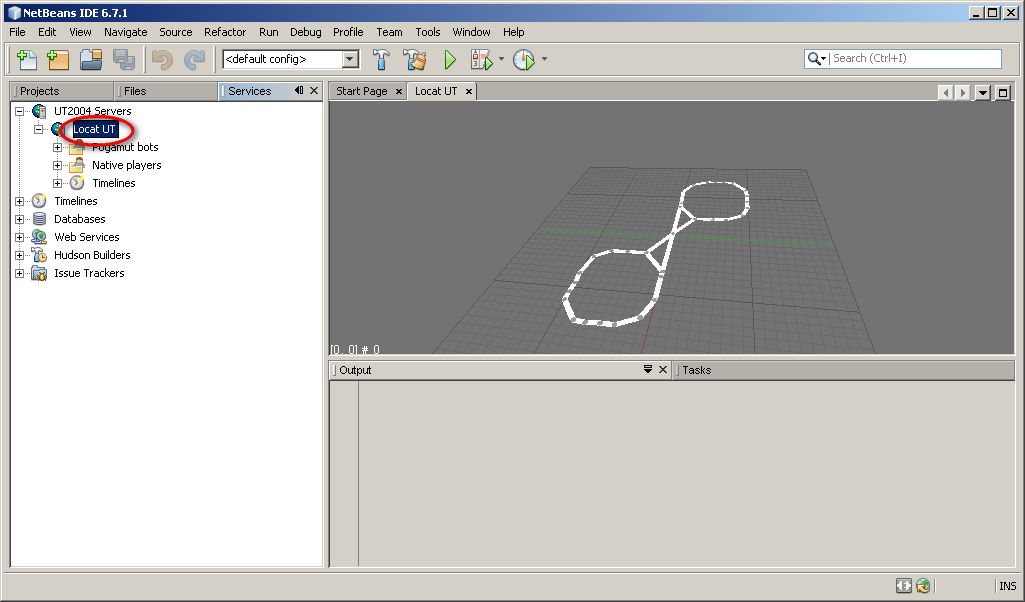
As you can see the view shows only navigation graph and your connected bot.

The geometry of the level itself is not shown. You can zoom the map by mouse wheel and rotate it by holding the Middle MB. Compared to the in game view this map shows far less detail but it is sufficient for general overview of the whole level. It is most useful when debugging team strategy.
You can always add a bot by right-clicking on NavigationBot ("Projects" tab) and press "Run" (or "Debug").
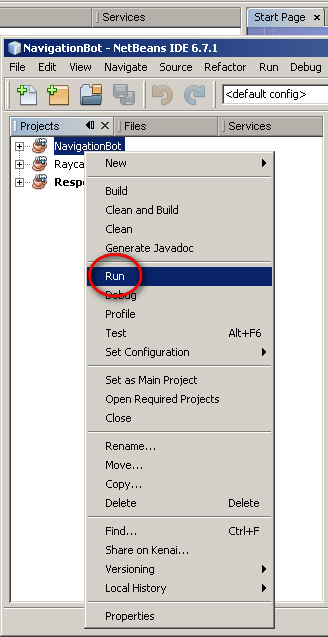
Added bot will appear on your map as another dot. You can add as many bots as you want.
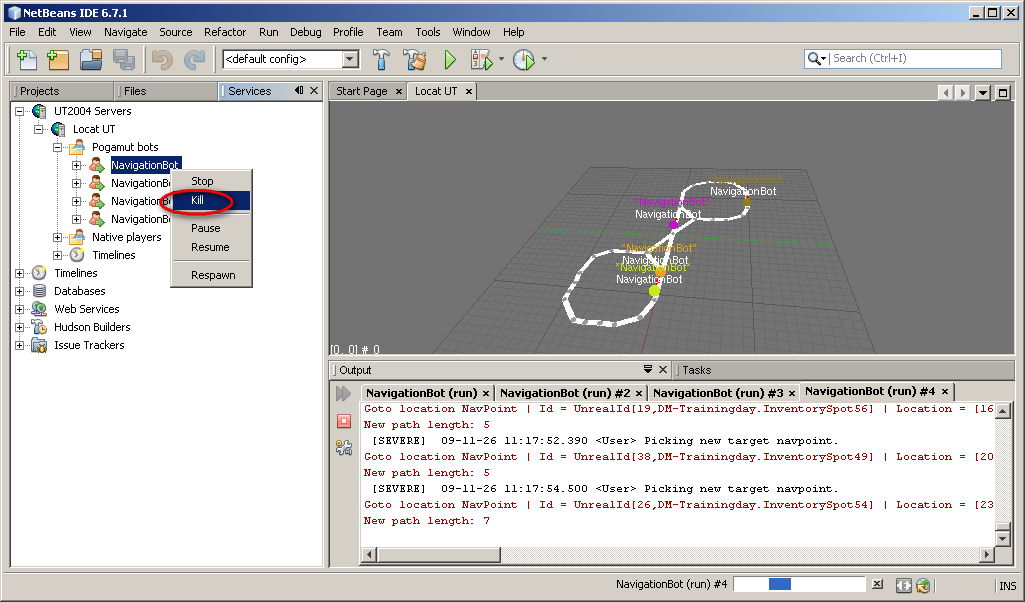
And to remove bot go to Local UT (server node), Pogamut bots and here right-click on some of those and press "Kill".