Purpose of this first tutorial is to get you familiar with basic concepts that will be needed in further tutorials. We will create simple bot that will just stand in the environment and issue some textual messages, it is a Pogamut analogy of "Hello world !" program (program used to demonstrate basics of given technology).
Let's start by opening the 00-EmptyBot example project bundled in the Pogamut plugin for Netbeans.
Follow these steps:
-
Open Netbeans ( → → → )
-
Once Netbeans were loaded open example project: → → → → then click
<title></title>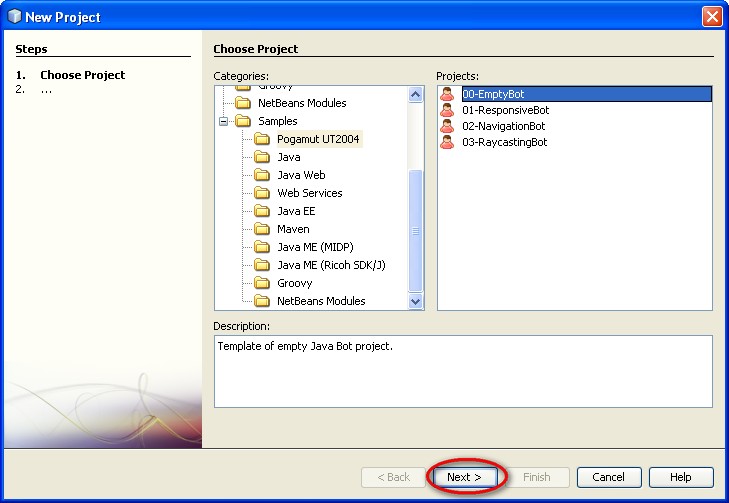
-
In New Project dialog enter name of the folder where the example will be unpacked, for example
00-EmptyBot, after you are finished click button.<title></title>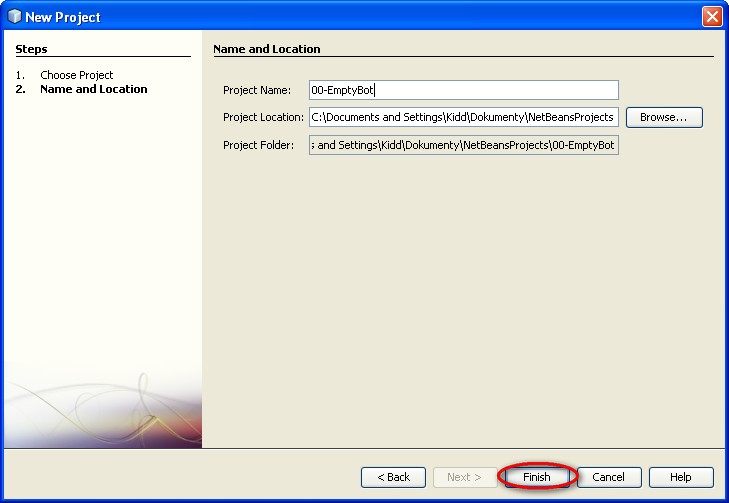
-
Now a project named "00-EmptyBot" will be opened in the Projects tab, open project's Source Packages sub folder and then the cz.cuni.amis.pogamut.ut2004.examples package contained in this folder
<title></title>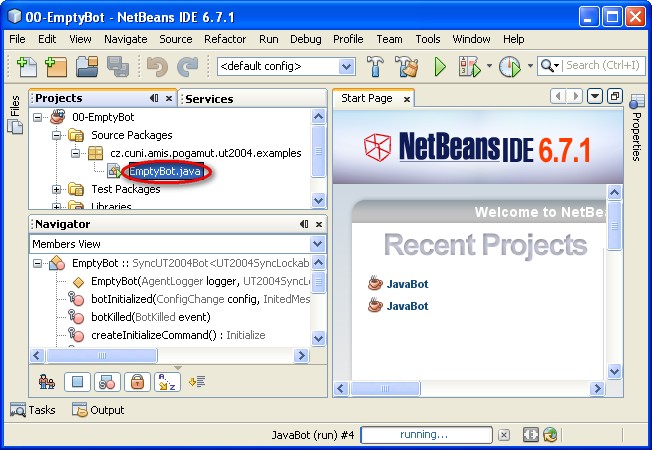
-
Finally double click
EmptyBot.javafile containing source code of our first bot
Notice that the project's node in Projects tab is in bold, this means that the (F6) and (Ctrl + F5) buttons are linked to this project. Before we will start this first bot we have to launch the Unreal Tournament dedicated server - an environment simulator that the bot will connect to. You have two options how to start the server:
-
Start standalone server
-
execute the server by running
startGamebotsDMServer.bat, wait untilMATCH STARTstring appears in the console, now the server is ready to receive bot connections -
let the server console window opened and return back to Netbeans, switch to Services tab (Ctrl + 5 or → ), right click UT2004 Servers node and select action
<title></title>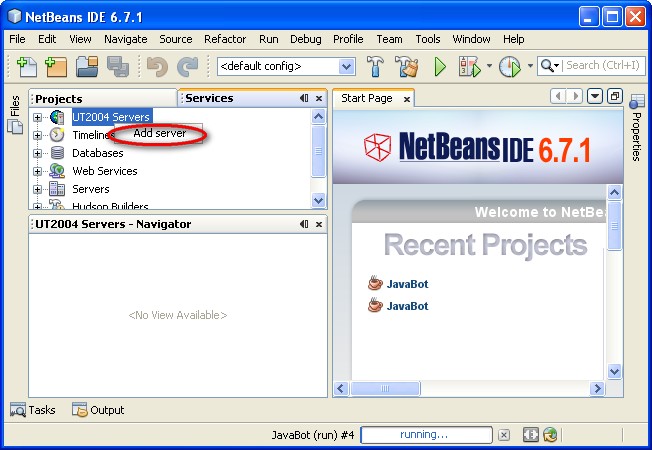
-
in the dialog that will appear you can optionally assign Server name, e.g..
Local UTand you have to specify server's complete URI (first delete the[not set]string and then type the URI), in this caselocalhost:3001then press button.<title></title>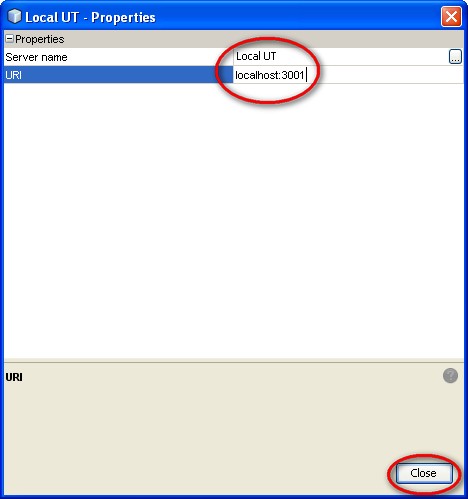
-
just created Local UT server will appear under the UT2004 Servers node, you will have to create this server only once, it will remain registered in the IDE
-
-
Start embedded server that will be executed directly from the Netbeans IDE
NOT IMPLEMENTED YET: TODO - implement this
Now the server is running and the IDE knows how to connect to it. You can start the bot by pressing F6 ( ). If everything is working fine the bot will connect to the server and begin execution. After starting the bot will appear under the Local UT node in Pogamut bots folder. It will be represented by a node named EmptyBot. If you select bot's node you will see some additional information about the bot in Properties window ( → ). Agent3D section shows properties defining bot's position in the space, Agent configuration section enables you to change bot's behavior/abilities (e.g. if the bot will be able to use raycasting, if it will automatically pick up items etc.). You will see that the bot is standing still, no movement, no rotation, after all thats what it was designed for.
To see how the bot is doing in the game you will have to start the Unreal Tournament (UT) client, you can:
-
Start the UT directly from Netbeans
Right click Local UT server node and select action, the UT2004 will start in the spectate mode and it will be automatically connected to the selected server.
<title></title>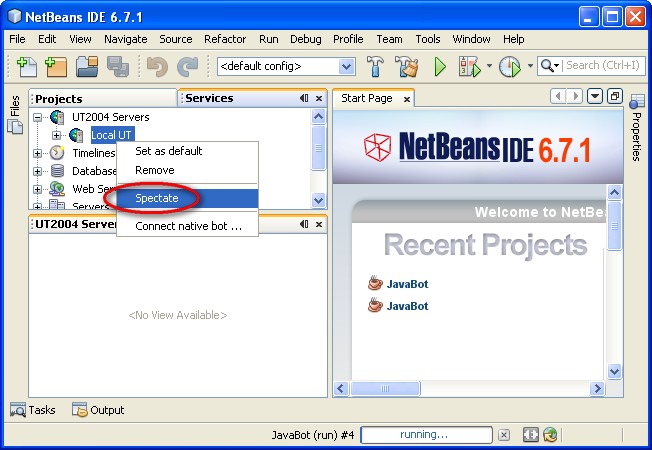
-
Start UT in a standard way
You can either use
When starting the UT for the first time it will open in a full screen mode, when developing bots you will often want to see both the Netbeans window and the UT. You have two options - use two monitors or configure UT to start in windowed mode, you can do this from main menu of UT → tab → Resolution panel → uncheck the checkbox.
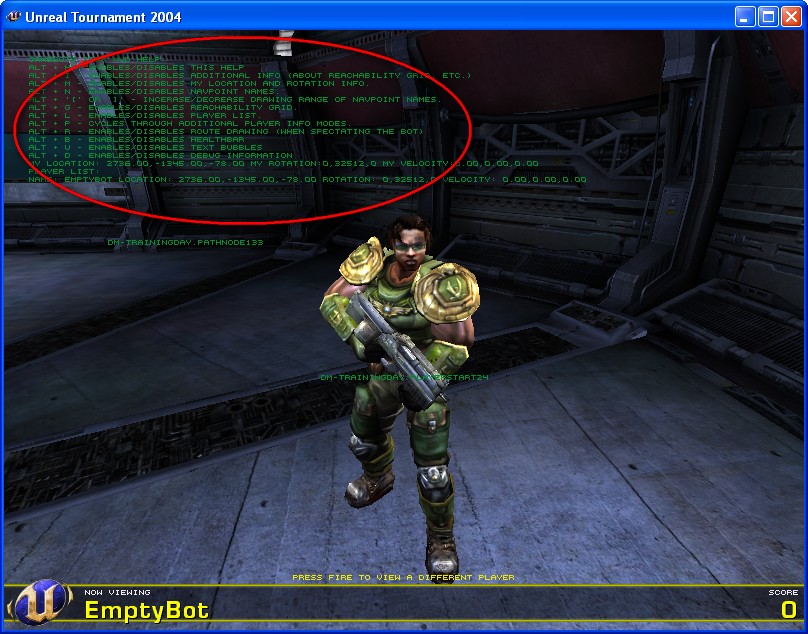
Inspecting the bot directly in the UT is a very handy debugging tool, you can see where the bot exactly is, whether it has stuck etc. Gamebots, Pogamut's extension of the Unreal Tournament, also adds some in game visualization features that can be useful when observing the bot. TODO popsat ted nebo v dalsich tutorialech?
Once the UT has connected to the game press left mouse button to view the bot. Also notice the green text in the upper half of the screen labeled GAMEBOTS 2004 HUD HELP, you can try some of the listed functions, but we will come to them later on.
Now return back to the Netbeans (if UT was in full screen mode use Alt + Tab). We will go through bot's source code in order to describe its basic idioms.
The EmptyBot extends SyncUT2004Bot class,
this is declared by line:
public class EmptyBot extends SyncUT2004Bot<UT2004SyncLockableWorldView>
SyncUT2004Bot is a base bot class that will
suit most situations. SyncUT2004Bot class has
several abstract methods that have to be implemented by the EmptyBot and
by any other bot extending from this class.
These methods are:
-
doLogic()- method called periodically by internal thread associated with the bot. It enables the bot to be proactive, that is to act "on his own" without any external stimuli. -
botKilled(BotKilled event)- called each time the bot has died -
botInitialized(ConfigChange config,
            InitedMessage init)
- called when the bot is already present in the environment -
createInitializeCommand()- used for setting initial properties of the agent such as it's name -
postPrepareBot(GameInfo info)- called when the bot connects to the environment,infoobject hold information about the game type, map etc. -
prePrepareBot()- called before the bot connects to the environment
Sequence of calling these methods is:
-
prePrepareBot() -
postPrepareBot(GameInfo info) -
createInitializeCommand() -
botInitialized(ConfigChange config, InitedMessage init) -
doLogic()- called N times, sometimesbotKilled(BotKilled event)will be also called during this phase
Let's explore methods implemented in this example. First
is createInitializeCommand():
    protected Initialize createInitializeCommand() {
        Initialize myInit = new Initialize();

        //just set the name of the bot, nothing else
        myInit.setName("EmptyBot");
        return myInit;
    }
In this method an Initialize object is
created, then a bot's name is set on it and finally the initialize
object is returned to the rest of Pogamut platform.
Second method is botInitialized(ConfigChange config,
InitedMessage init):
    protected void botInitialized(ConfigChange config, InitedMessage init) {
        // Display a welcome message in the game engine
        getAct().act(new SendMessage().setText("Hello world! I am alive!"));
    }
The "Hello world!" message is printed there. This method shows the
basic interface that the agent uses to perform actions in the
evironment. The getAct() method returns object
implementing IAct interface that defines
act(CommandMessage command) method. The
act(...) method is the gateway for issuing
actions represented by CommandMessage objects.
SendMessage is a command that sends message to a
global chat channel, the constructor. Notice that the object is created
and it's name property is set in only one line. The
setTextg() method returns the instance on which
it has been called, so more properties can be set in a chain e.g.
new SendMessage().setText("Hello!").setFadeOut(5).
Note
To see all command objects that you can use in your bot open
CommandMessage class definition, to do this
as quickly as possible press Ctrl + O and type name
of the class to find, in this case
CommandMessage. Once the source opens in the
central window press Alt + F12 to open
Hierarchy browser. Now you can see list of all
classes extending the CommandMessage which
are commands provided by the PogamutUT2004.
Last method that will be described in this section is
main(). This is the first method called when
you execute the bot program (as in any Java program). This method is
responsible for instantiating the bot and connecting it to the
environment. All these, by the way nontrivial, steps are
    public static void main(String args[]) {
        IAgentRunner runner = new BotRunner(new UTGuiceSyncFactory(EmptyBot.class), "localhost", 3000);
        runner.startAgent();
    }
The doLogic() method will be described in
the next section.
Two features that you will find handy during parameterization and evaluation of the bot are logging and introspection.
Logging is a mechanism for tracing program execution by printing messages - it can be used both in debugging (multi threaded applications are often hard to debug with breakpoints) and evaluation (you can process log of bot's decisions using some statistical software).
Introspection is designed to ease you parameterization of the bot. It is often needed to adjust online multiple behavior parameters and you will usually end creating your own GUI (graphical user interface) for this purpose. In introspection you just annotate desired variables with @JProp annotation and they will be accessible in the Netbeans GUI.
Let's look how logging and introspection works in EmptyBot
example. First start the bot (F6), then have a look on
it's source code. In the initial section several variables annotated
with the @JProp are defined.
    @JProp
    public String stringProp = "Hello bot!";
    @JProp
    public boolean boolProp = true;
    @JProp
    public int intProp = 2;
    @JProp
    public double doubleProp = 1.0;
Now expand bot's node
under the UT server node (in Services tab), you
will see two new nodes, Logs and
Introspection. After selecting the
Introspection node the annotated variables will be
shown in the Properties (Ctrl + Shift +
7) window. Note that the intProp variable is
being continuously updated. New values of variables can be also set in
this window.
Last non-empty method is doLogic(). This
is the place where intProp variable is incremented
and where we first encounter Pogamut logging.
    protected void doLogic() throws PogamutException {
        // Log example message this won't be shown in the game, it is just for
        // debugging purposes
        getLogger().user().severe("Still working");

        // Increment the example property, you should observe in the IDE how
        // fast it is being incremented
        intProp++;
    }
Line getLogger().user().severe("Still working") writes
message "Still working" to the User log. Pogamut
bot's have four standard logs:
-
User- used for logging messages from the user code -
Platform- used for Pogamut library logging, e.g. during startup, exceptions etc. -
In- incoming messages describing current state of the environment -
Out- outgoing commands issued by the bot
All these logs can be observed under bot's Logs node. Select User log node and you will see a table with plenty of "Still working" messages.